
Growing up I hated sauerkraut. My Dutch parents loved it, buying it in a jar from the supermarket. I don’t recall them ever making it.
Mum told stories of my Oma making it and storing it in the root cellar in a large crock. I imagine when it was one of your jobs to help make it for a large family (11 kids) you would not be keen on returning to the “old ways”. Buying a jar off the shelf was much easier.
But is it as good?
It turns out it’s not.
Benefits of Fermented Foods
Fermented foods contain probiotics, beneficial bacteria that are good for digestive health.
When you process fermented foods with heat to preserve them you lose all those beneficial qualities. You’re left with sour cabbage. I mean that’s ok if that’s what you like, but I like food that can do double duty – tastes good and is good for me.
I have IBS (Irritable Bowel Syndrome) and have adverse reactions to a lot of vegetables in the Brassica family (and more unfortunately) – cabbage, cauliflower etc. Thankfully not broccoli or kale. IBS sufferers experience different reactions to different foods so it’s important to find what affects you.
But when I ferment cabbage, making sauerkraut, I can eat it with little to no effect.
Probiotics are excellent for anyone suffering from IBS. I prefer food with natural probiotics, rather than relying on over-the-counter medication.
I have been making sauerkraut for nine years or so. I go through phases, sometimes eating a lot of it, sometimes eating none.
But we also consume milk kefir and kombucha regularly ensuring we benefit from fermented foods daily.
IMPORTANT: If you are new to eating fermented foods, start by eating a small amount (one teaspoon), and slowly increasing your daily amount. Your digestive system will need time to adjust and from experience, I have found it takes three to four weeks for my body to adapt to changes in my diet.
How to Eat Sauerkraut
As a kid, I hated the sour taste of sauerkraut, but now I love the pop of flavour it brings to a meal. A spoonful or two is enough each day as a side to your main meal.
I also love it in wraps – roasted meat, creamy mayo and the crunch and flavour of sauerkraut.
Or a homemade sausage sandwich (or roll/wrap) – a tasty sausage, mustard, tomato or BBQ sauce, shredded cheese and sauerkraut.
Or if you have ever had a great Reuben sandwich, you will know what I mean, that sauerkraut is amazing!
Ok, now I am hungry!

Making Sauerkraut – Fermented Cabbage
Sauerkraut is made using lacto-fermentation which uses bacteria that produces lactic acid to break down the sugars in certain foods. The easiest form of lact0-fermentation uses a saltwater brine combined with a food that naturally contains lactic acid bacteria such as cabbage or cucumbers.
The original recipes I followed to make sauerkraut advised using one tablespoon of salt with one medium head of cabbage.
But how big is a head of cabbage? Small, medium, large or teeny tiny. Supermarket cabbages may be a similar size, but there are no guarantees.
Then you risk not using the right amount of salt – too little and your cabbage won’t be safe (think bad bacteria) and too much and it will be too salty (not nice).
It becomes even more challenging when you grow cabbages. Sometimes to save cabbages from pests I harvest them small and sometimes they are huge. My point is their weights vary wildly vary.
A while ago I found a recipe that used percentages.
This is not normally my style. I like things to be uncomplicated and use as few steps as possible. But in this case, weighing my ingredients to get a better result is well worth it. And not that big a deal to be fair.
Salt is an essential ingredient in fermentation.
I use any natural salt, NEVER a table or iodized one. The additives in iodized salt can affect your fermentations.
Here is my straightforward sauerkraut recipe (alternative equipment and methods are outlined below):
1. Take whatever cabbage you have on hand, clean, core and shred. I shred cabbage by hand with a knife. I prefer the course texture of hand-shredded cabbage in the final product. You can use a food processor, but in my opinion, it is too fine.
2. Weigh the cabbage
3. Add 2% salt to cabbage
4. Mix the salt and cabbage and leave for 10 minutes or more to allow the salt to draw the liquid out of the cabbage OR jump right in and begin. I’m impatient. Either way is fine.
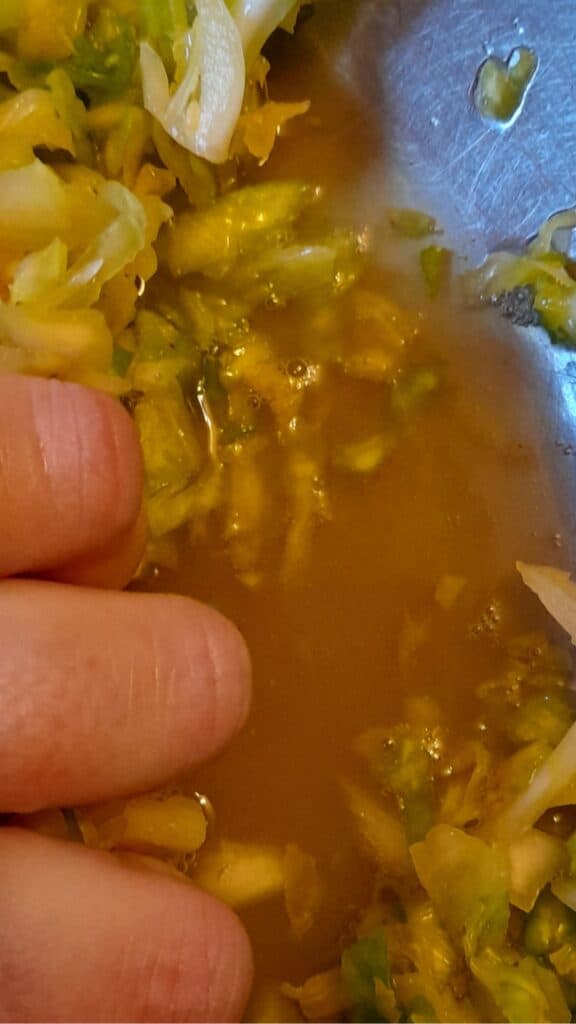
5. With your hands, massage the cabbage and salt until the cabbage softens and releases liquid. It should take about five minutes or so.
6. At this stage, you can add caraway seeds, or I like to use fennel seeds or dill. Or keep it plain.
7. Fill a jar with the cabbage packing it down tightly, pushing the liquid to the top. Pour any remaining liquid from the bowl on top to cover the cabbage. If you do not have enough liquid to cover the cabbage, make a brine from one tsp salt to one cup water and pour to cover. Be sure to use ONLY filtered water and not tap water. (If you do not have filtered water, use tap water by leaving it uncovered for 24 hours or boil water for 15 minutes to remove the chlorine which can affect your ferments.)
8. Use a weight (I use a glass weight) to push the cabbage beneath the liquid. This is very important because if any cabbage is above the liquid it can mould. I will explain an alternative method to using the glass weight below.
9. Add a pickle pipe or airlock (see below for an alternative) to the jar and secure it with a jar band.
10. Place the jar in a warm place to ferment. The ideal temperature for ferments is 16°C to 24°C. Put a tea towel, cloth or tray underneath to catch any liquid that might escape.
11. Taste after a week to see if you like the flavour. If not ready at this stage, keep tasting daily until it is.


When your sauerkraut is ready, remove the pickle pipe (or airlock) add a lid to the jar and pop the sauerkraut into the fridge ready to enjoy. If it needs to be more robust in sour flavour I leave it to ferment longer, tasting it each day until I am happy.
Your sauerkraut should have a pleasant sour taste and not be salty. Refrigeration will slow the fermentation down, but not altogether. In my experience, sauerkraut will last in the fridge for at least a few months, but I have had some for up to a year (it was a massive jar of sauerkraut!). The flavour may change slightly but not become unpleasant, slightly more sour.
Keep the cabbage covered with liquid as much as possible and check regularly for any mould or unpleasant smell.
I have never had sauerkraut go bad. It is a living product with beneficial bacteria.
Make smaller batches to begin. Once you determine how much you consume you can make bigger, or smaller, batches to suit. If you are not used to fermented foods, it may take time for your taste buds to adjust.
Fermenting Equipment
Several years ago I invested in a fermentation kit when I knew I would get the use out of it. The kit I bought is compatible with mason jars, which I already had. A kit is not necessary, however, because I make fermented foods frequently I have found it to be a good investment.
Below I outline how to use items from the kit I bought, as well as how I made sauerkraut before owning it.

Jar or Crock
I use “mason” style jars because that’s what I have. I do a lot of preserving and always have these jars on hand. The size of the jar depends on how much cabbage I have.
Mason jars come with a two-piece lid – a band and a flat.
Fermenting crocks are available to make large batches of sauerkraut. These come with weights to hold the cabbage below the liquid. I prefer to make smaller quantities so a crock is unwarranted for me, but if you have a large family I could see how one would be beneficial.
But any large jar will work. A wide-mouth jar is handy for packing the cabbage down using a tamper or your fist.
Weights
My fermentation kit included glass weights that fit with the mason jars I have.
You can use a whole or part cabbage leaf folded (or torn) to fit over the shredded cabbage keeping it submerged and then put the weight on. I use the glass weight without the cabbage leaf. I find the weight does a good enough job of keeping everything submerged.
Before I used glass weights, I used a cabbage leaf to keep the contents submerged and either a small glass or small Ziploc bag with some water in it to use as a weight and a normal lid on top that I “burped” regularly to release the buildup of gas.
Lids, Pickle Pipes or Airlock
There are several Airlocks used for fermentation of various foods and drinks.
Sauerkraut is created with lactic acid fermentation. This process creates gas which needs to be released.
An airlock allows the gas to escape.
I use a pickle pipe – made of silicon with a small hole to allow gas to be released. The pickle pipes are compatible with mason jars and bands.
The airlock and pickle pipe require a band to hold them in place or screw onto the top of the jar.
Before I used the pickle pipes, I put the lid on the jar and burped it every time I walked past to release the gas. The jar MUST be burped regularly. You can set a reminder a few times daily.

Tamper
The fermentation kit I bought came with a wooden tamper making it easy to pack the cabbage into the jar.
There is no need for one. If you use a wide-mouth jar you can use your fist instead.
Kitchen Scales
Kitchen scales are relatively inexpensive so I recommend investing in one if you don’t already own one.
Or you can use the ratio of:
One tablespoon of salt to One head of cabbage (approx. 800g).
Some recipes make a brine to pour over the cabbage without massaging it (this method is also used for fermenting other vegetables), but I prefer to use the liquid of the cabbage. From my experience, you get a better product and won’t have as much liquid escaping the jar.
Heat Mat (Optional)
Our house is painfully cold in winter, so I use a seed-raising heat mat to put my ferments on.
Just be aware that in winter your sauerkraut can take longer to ferment. Find the warmest place possible in your house but remember to keep your ferments out of direct sunlight.
And lastly …
If sauerkraut is an every-now-and-then item you make, I wouldn’t bother investing in special items to make it. Find a process that works for you and tweak it as needed.
On the other hand, if sauerkraut becomes a staple in your household, then I highly recommend investing in equipment that makes the process easier. I have found I had fewer issues like moulding after I started using specialized equipment.
Fermenting foods is a great way to preserve excess produce and stop food waste using uneaten vegetables that would otherwise be thrown out. It is good for your health and low-cost to make.
It is important to check your ferments daily. Check for mould and burp jars if needed. Become accustomed to how fermented food looks and smells and how it changes over time. It can seem daunting at first but it will become easier. Mould is your only true enemy but that should not be a problem if the cabbage is submerged.
I set daily alarms on my phone to remind me, as I found when starting, I would forget about them for days. As you can imagine I had a lot of failures.
Also, it is worth mentioning again that you should slowly introduce sauerkraut, or any fermented foods, into your daily diet. Start with a teaspoon a day for a week and slowly increase the amount. You may experience digestive unease in the beginning (gas, you may have lots of gas!!), but you should find after three to four weeks the symptoms will ease.
Sauerkraut is a favourite for me because it means I always have a small side dish on hand to serve with most meals. It also means I can take a vegetable I could not eat without extreme adverse reactions and turn it into something I can enjoy.
It is also beneficial to my health.
A huge win in my book.
Have fun fermenting!